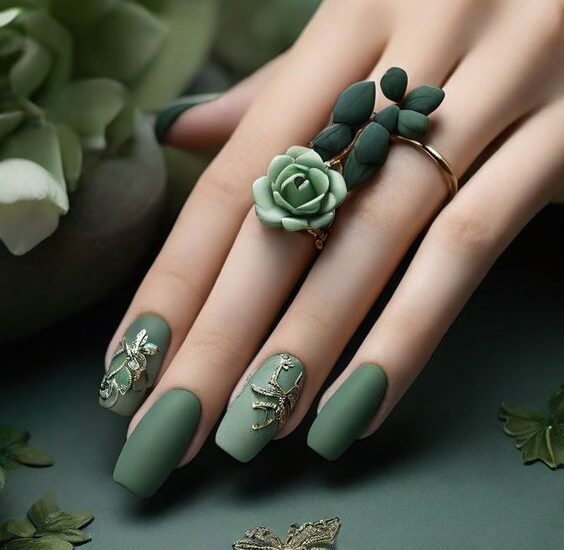
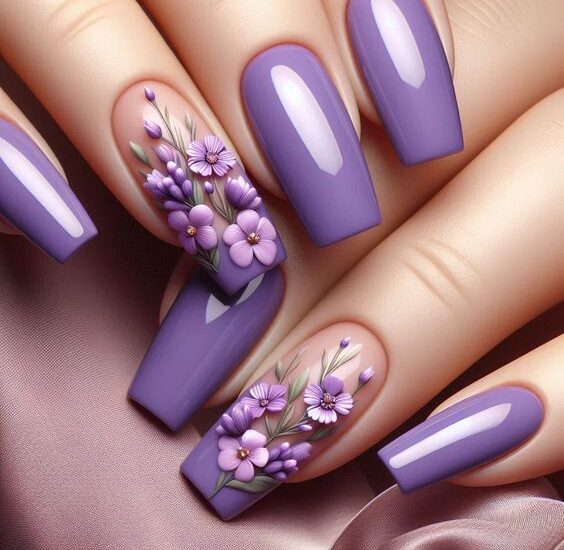
25 Sweater Nail Art for Winter: Cozy and Chic Designs
Sweater nail art for winter offers a cozy, chic look. It mimics the texture of knitted sweaters on your nails.
Sweater nail art is perfect for embracing the winter season with style. This trend features intricate designs that resemble the patterns and textures of warm, knitted sweaters. The technique involves using gel polish and fine detailing tools to create raised, three-dimensional effects on the nails.
Popular colors for this nail art include classic winter shades like deep blues, rich reds, and neutral tones. Sweater nail art not only adds a touch of elegance to your look but also keeps your nails on-trend during the colder months. It’s a fantastic way to showcase your creativity and love for winter fashion.
Winter Nail Trends
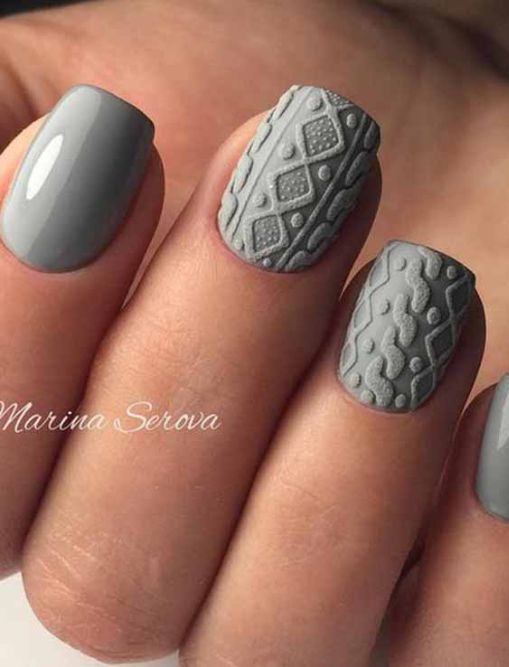
Winter is the perfect time to experiment with cozy and chic nail designs. Sweater nail art has become a must-try trend this season. This style mimics the look of knitted sweaters, adding warmth and texture to your nails. In this post, we’ll explore the latest winter nail trends, including popular designs and color palettes for sweater nail art.
Current Popular Designs
Sweater nail art offers a variety of designs that are trending this winter. Cable knit patterns are a favorite. These designs replicate the texture of your favorite winter sweaters. They look intricate but can be achieved with the right tools and techniques.
- Matte Finish: Matte polishes give sweater nails a soft, fabric-like appearance.
- 3D Elements: Raised patterns add a tactile element to your nails.
- French Tips: Combine classic French tips with sweater designs for a modern twist.
- Accent Nails: Feature sweater patterns on one or two nails for a subtle look.
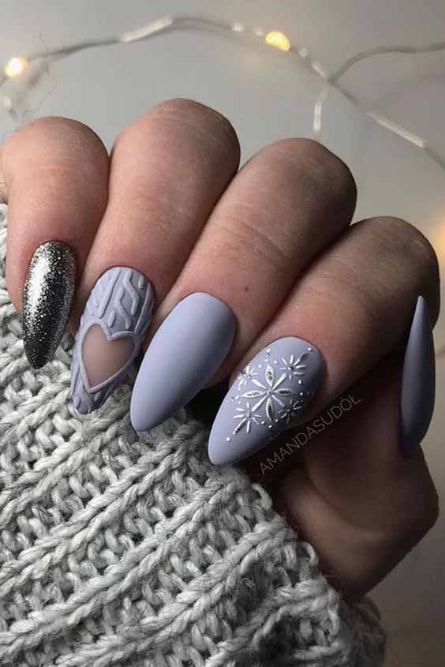
- Mixed Textures: Pair sweater nails with glitter or metallic accents for contrast.
Related Articles: 30 Most Exciting 4th July Acrylic Nail Art Design
Here’s a table of tools you might need:
| Tool | Purpose |
|---|---|
| Dotting Tool | Create precise patterns |
| Matte Top Coat | Achieve a matte finish |
| Striping Brush | Draw fine lines |
| 3D Gel | Add raised designs |
These designs can be customized to fit your style. Experiment with different patterns and textures to make your nails stand out.
Color Palettes For Winter
Choosing the right color palette is crucial for sweater nail art. Winter colors are typically muted and cozy. Popular shades include deep blues, warm reds, and soft pastels. These colors evoke the feeling of a snug winter day.
- Deep Blues: Navy and royal blue add a touch of elegance.
- Warm Reds: Burgundy and maroon provide a festive feel.
- Soft Pastels: Light pinks and baby blues offer a subtle, cozy look.
- Neutral Tones: Beige and gray are versatile and chic.
- Metallic Accents: Silver and gold add a festive touch to your nails.
Here’s a color palette table:
| Color | Description |
|---|---|
| Navy Blue | Deep and elegant |
| Burgundy | Warm and festive |
| Light Pink | Soft and cozy |
| Beige | Neutral and versatile |
| Silver | Metallic and festive |
Match your nail polish with your winter wardrobe for a cohesive look. Experiment with different color combinations to find what suits you best. Winter is the ideal time to embrace these cozy and stylish shades.

Essentials For Nail Art
Winter is the perfect time to get cozy, and what better way to embrace the season than with sweater nail art? This trendy look mimics the texture of your favorite knitwear, adding a warm, stylish touch to your nails. To achieve this charming design, it’s essential to have the right tools and materials. Let’s dive into the essentials for creating stunning sweater nail art.
Tools You’ll Need
Creating sweater nail art requires specific tools to achieve the intricate knit patterns. Here are the essentials:
- Nail Brushes: Fine, detailed brushes help create precise lines and patterns.
- Dotting Tools: These tools are perfect for making dots and small details.
- Nail Tape: Use nail tape to create clean, straight lines and sections.
- UV/LED Lamp: If you’re using gel polish, a UV or LED lamp is necessary for curing.
- Top Coat: A good top coat seals in your design and adds a glossy finish.

Here is a table summarizing the essential tools:
| Tool | Purpose |
|---|---|
| Nail Brushes | Creating fine lines and patterns |
| Dotting Tools | Adding dots and small details |
| Nail Tape | Creating straight lines |
| UV/LED Lamp | Curing gel polish |
| Top Coat | Sealing and adding shine |
Having these tools on hand will make your nail art process smoother and more enjoyable. Investing in quality tools ensures your designs look professional and last longer.
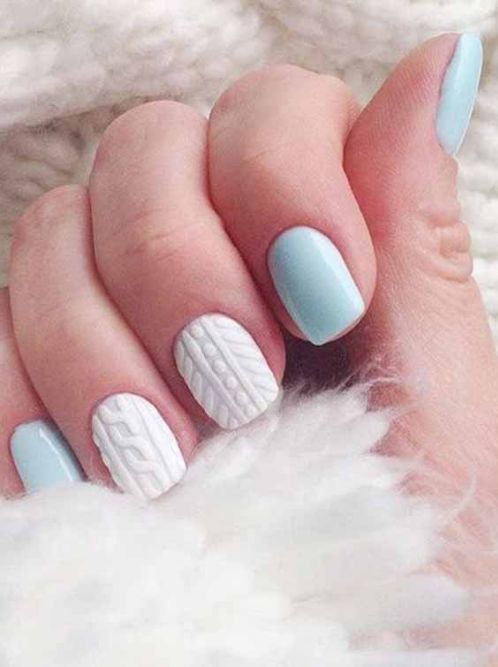
Choosing The Right Polish
Selecting the right polish is crucial for achieving the perfect sweater nail art. Here are some tips:
- Base Coat: Start with a good base coat to protect your natural nails.
- Gel Polish: Gel polish is ideal for sweater nail art because it stays in place and cures hard under UV/LED light.
- Matte Finish: A matte top coat can give your design a more authentic sweater look.
- Neutral Colors: Choose neutral or pastel colors for a cozy, wintery feel.
Here’s a simple guide to choosing polishes:
- Apply a base coat to protect your nails.
- Choose a gel polish in your desired color.
- Apply a matte top coat for a textured finish.
- Use contrasting colors for the knit pattern to make it stand out.
By selecting the right polishes, you can create a beautiful, long-lasting sweater nail art design. Experiment with different colors and finishes to find the perfect winter look for your nails.

Sweater Patterns
Winter is the perfect time to explore the cozy and chic trend of Sweater Nail Art. One of the most popular styles in this trend is Sweater Patterns. These designs mimic the look of your favorite winter sweaters, adding a snug and stylish touch to your nails. Whether you prefer intricate Cable Knit Designs or playful Fair Isle Inspirations, sweater nail art offers endless possibilities to keep your nails looking fabulous all season long.
Cable Knit Designs
Cable knit designs bring the classic look of chunky, woven sweaters to your fingertips. These designs are perfect for adding texture and depth to your nails, creating a warm and inviting look.
Here are some tips for achieving the perfect cable knit design:
- Use a neutral base color: Shades like beige, cream, or light gray mimic the look of traditional knitwear.
- Opt for a 3D gel polish: This helps create the raised, textured effect that is characteristic of cable knit patterns.
- Practice your pattern: Use a fine brush or a dotting tool to create the intricate lines and loops of the cable knit design.
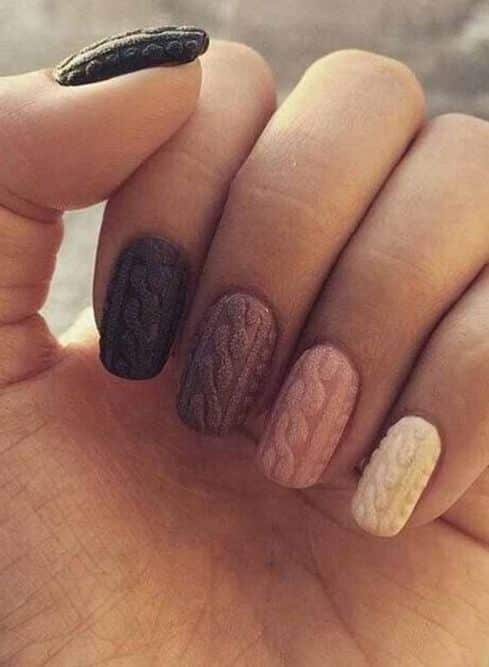
For a step-by-step guide, you can follow this simple table:
| Step | Description |
|---|---|
| 1 | Apply a base coat and let it dry. |
| 2 | Paint your nails with the neutral base color. |
| 3 | Using the 3D gel polish, draw vertical lines down the center of the nail. |
| 4 | Add small loops on either side of the vertical lines to mimic the cable knit pattern. |
| 5 | Allow the gel polish to cure under a UV lamp. |
| 6 | Seal with a top coat for added durability. |
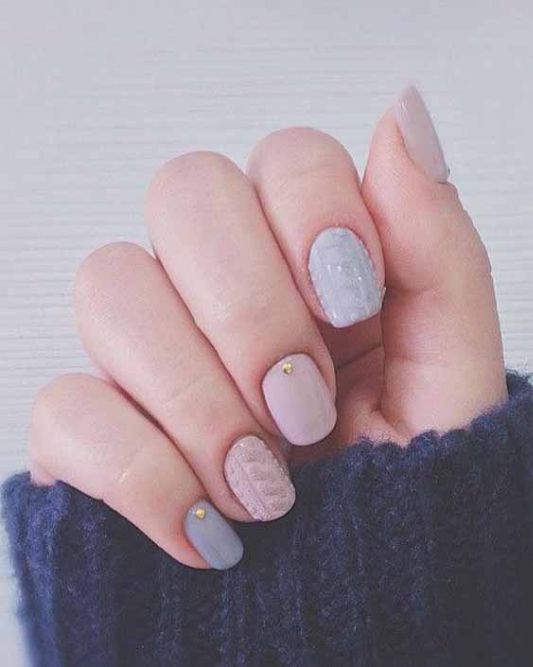
Fair Isle Inspirations
Fair Isle designs are inspired by the traditional knitting technique from the Shetland Islands in Scotland. These patterns are known for their colorful, geometric motifs, making them perfect for a fun and festive winter nail art look.
To create your own Fair Isle-inspired nails, consider these steps:
- Choose a vibrant color palette: Reds, blues, greens, and whites are traditional Fair Isle colors.
- Use a fine detail brush: This will help you create the small, intricate patterns that define Fair Isle designs.
- Start with a base coat: Apply a white or light-colored base to make your patterns pop.
Here’s a breakdown of a simple Fair Isle nail design:
| Step | Description |
|---|---|
| 1 | Apply a base coat and let it dry. |
| 2 | Paint your nails with the base color. |
| 3 | Using a fine detail brush, draw small triangles, dots, and zigzags in contrasting colors. |
| 4 | Repeat these patterns across the nail for a cohesive look. |
| 5 | Allow the design to dry completely before adding a top coat. |
These steps will help you achieve a beautiful and festive Fair Isle-inspired nail design. Let your creativity shine and enjoy the cozy vibes of sweater nail art this winter!
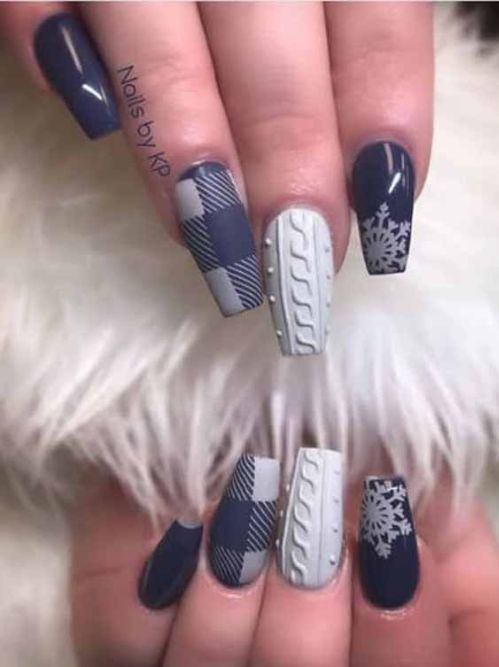
Step-by-step Tutorial
Winter is the perfect time to flaunt cozy sweater nail art. This design mimics the look of your favorite knitted sweaters, making your nails a winter fashion statement. In this step-by-step tutorial, we’ll guide you through the process of creating beautiful sweater nails that will keep you stylish all season long.
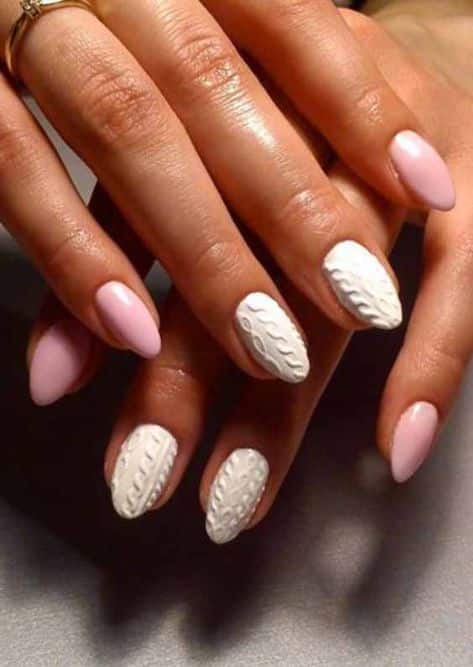
Base Coat Application
Before starting any nail art, applying a base coat is crucial. This protects your natural nails and helps the polish adhere better. Follow these steps to apply the base coat:
- Clean your nails: Use a nail polish remover to get rid of any old polish and oils.
- Trim and file: Shape your nails to your desired length and smooth the edges with a nail file.
- Buff the surface: Lightly buff the surface of your nails to remove ridges and create a smooth base.
- Apply the base coat: Using a thin layer, apply the base coat to each nail. Allow it to dry completely before moving to the next step.

Here’s a quick table summarizing the base coat application process:
| Step | Description |
|---|---|
| Clean | Remove old polish and oils |
| Trim & File | Shape and smooth nail edges |
| Buff | Remove ridges |
| Apply Base Coat | Thin layer and let dry |
Make sure each layer is thin and even for the best results. A well-applied base coat sets the stage for a perfect sweater nail art design.

Creating The Sweater Effect
Now that your base coat is applied and dry, it’s time to create the sweater effect. This part requires patience and a steady hand. Follow these steps:
- Apply base color: Choose a cozy, wintery color and apply two coats. Let each coat dry completely.
- Matte top coat: Apply a matte top coat to give your nails a knitted fabric look. Allow it to dry fully.
- Use a fine brush: Dip a fine nail art brush into a slightly darker shade of your base color.
- Draw cable knit patterns: Carefully draw lines and patterns resembling a cable knit sweater. You can create braids, twists, and other knit designs.
- Add texture: To add texture, sprinkle acrylic powder over the wet polish designs. This gives a raised, fabric-like texture.
- Seal the design: Once dry, seal your art with a clear top coat to protect your design and add shine.
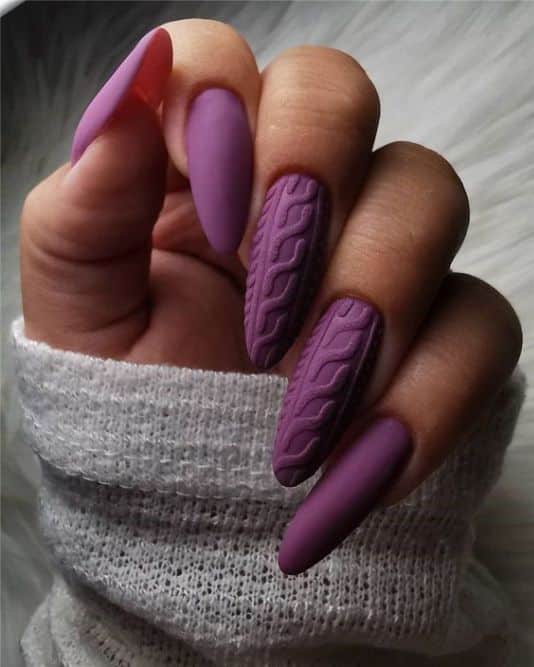
Here’s a visual breakdown of the sweater effect steps:
| Step | Description |
|---|---|
| Base Color | Apply two coats of your chosen color |
| Matte Top Coat | Apply matte top coat and let dry |
| Fine Brush | Use a fine brush to draw knit patterns |
| Texture | Sprinkle acrylic powder for texture |
| Seal | Apply clear top coat to protect |
Experiment with different patterns and colors to make your sweater nail art unique. With practice, you’ll master this cozy and chic winter nail art.
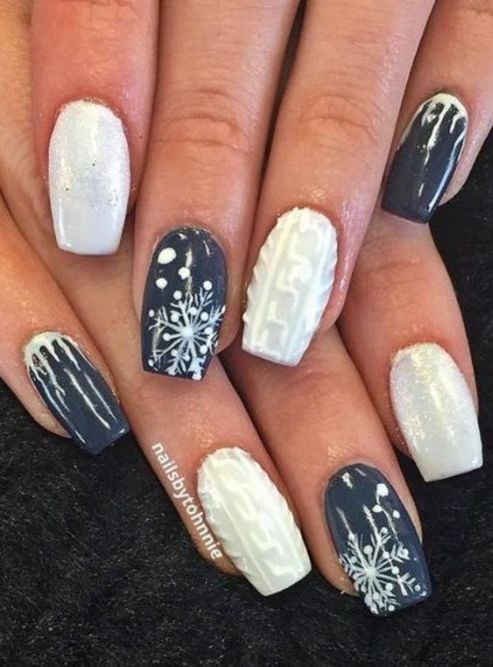
Nail Art Techniques
Winter is the perfect season to showcase cozy and stylish sweater nail art. This trend captures the essence of warmth and comfort, making your nails look chic and festive. To create these stunning designs, different nail art techniques can be employed. Let’s delve into some popular methods that will help you achieve the perfect sweater nail art for winter.
Stamping Methods
Stamping methods are a popular choice for creating intricate sweater nail art designs. They offer precision and consistency, even for beginners.
To begin, you’ll need a stamping kit which includes:
- Stamping plates with various patterns
- A stamper
- Scraper
- Nail polish

Follow these steps:
- Apply a base coat to your nails and let it dry.
- Choose your desired pattern from the stamping plate.
- Apply nail polish to the selected pattern.
- Use the scraper to remove excess polish.
- Press the stamper onto the pattern to pick up the design.
- Transfer the design onto your nail by gently rolling the stamper across your nail.
- Seal your design with a top coat.
Some tips for better results:
- Use a light touch when rolling the stamper.
- Clean the stamping plate after each use to avoid smudging.
- Practice on a sheet of paper to get comfortable with the technique.

Freehand Painting Tips
Freehand painting allows for more creativity and personalization. It requires a steady hand and a bit of practice, but the results are worth it.
Here’s what you need:
- Fine-tipped nail art brushes
- Acrylic paint or nail polish
- Base and top coat
Steps to achieve freehand sweater nail art:
- Apply a base coat and let it dry completely.
- Using a fine-tipped brush, paint lines and patterns to mimic sweater textures.
- Start with simple lines and gradually add details like dots and zigzags.
- Allow the paint to dry before adding more layers to avoid smudging.
- Finish with a top coat to protect your design.

Helpful tips:
- Practice on a nail wheel to perfect your technique.
- Use a magnifying glass for intricate details.
- Mix colors to create unique designs.
Both techniques offer unique advantages and can be combined for stunning results. Whether you choose stamping or freehand painting, your sweater nail art will surely stand out this winter.
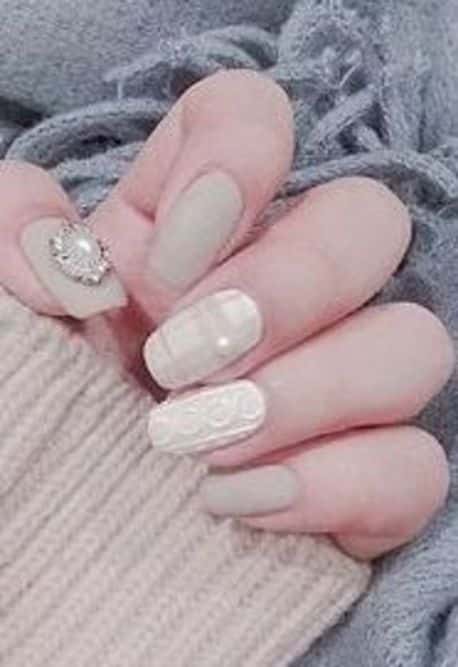
Accessorizing Your Nails
Winter is the perfect season to showcase your creativity with sweater nail art. The cozy patterns and textures can warm up any look. But why stop there? Accessorizing your nails can add an extra layer of charm and elegance to your winter style. Let’s explore some exciting ways to elevate your sweater nail art.
Adding Glitter
Glitter can make your sweater nail art truly sparkle. It adds a touch of glam to your nails and is perfect for the festive season. Here are a few ways to incorporate glitter into your nail designs:
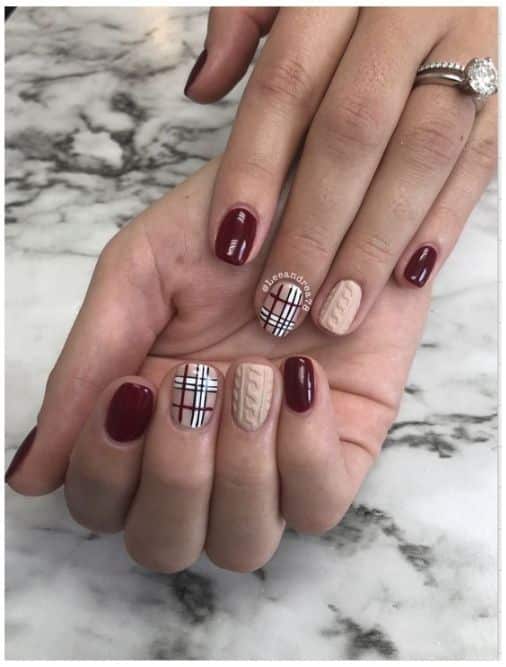
- Full Glitter Nails: Apply glitter polish to one or two nails for a standout effect.
- Glitter Tips: Add glitter to the tips of your nails for a subtle sparkle.
- Glitter Patterns: Use glitter to highlight specific patterns in your sweater design.

For a more detailed look, here’s a simple table showing different types of glitter and their effects:
| Type of Glitter | Effect |
|---|---|
| Fine Glitter | Gives a smooth and subtle sparkle. |
| Chunky Glitter | Creates a bold and eye-catching look. |
| Holographic Glitter | Adds a rainbow effect to your nails. |
Applying glitter is simple. Use a fine brush for detailed work or a sponge for a more concentrated effect. Seal with a top coat to keep the glitter in place.
Using Nail Stickers
Nail stickers are an easy and quick way to enhance your sweater nail art. They come in various designs and can add intricate details without much effort. Here’s how you can use them:
- Choose Your Stickers: Select stickers that complement your sweater design.
- Apply Base Coat: Start with a base coat to protect your nails.
- Place the Stickers: Carefully place the stickers on your nails using tweezers.
- Seal with Top Coat: Finish with a top coat to secure the stickers.
Here are some popular types of nail stickers:
- Floral Stickers: Perfect for adding a touch of nature to your nails.
- Geometric Stickers: Great for a modern and stylish look.
- 3D Stickers: Adds depth and texture to your nail art.
Using nail stickers is a fantastic way to accessorize your nails without spending too much time. They are also ideal for beginners who want to create professional-looking nail art.

Maintenance Tips
Winter brings cozy vibes, and what better way to embrace the season than with sweater nail art? This trendy design mimics the look of knitted sweaters, adding a touch of warmth to your nails. To keep your sweater nail art looking fabulous all season, you’ll need some maintenance tips. Here’s how you can ensure your nails stay fresh and protected.
Keeping Your Design Fresh
To keep your sweater nail art vibrant and intact, follow these tips:
- Apply a top coat: Use a high-quality top coat to seal your design. This prevents chipping and adds a glossy finish.
- Avoid excessive water exposure: Water can cause your nail art to fade. Wear gloves when washing dishes or cleaning.
- Use cuticle oil: Apply cuticle oil daily to keep your nails and cuticles hydrated. This prevents cracking and peeling.
- Be gentle with your nails: Avoid using your nails as tools. This helps prevent breakage and keeps your design intact.
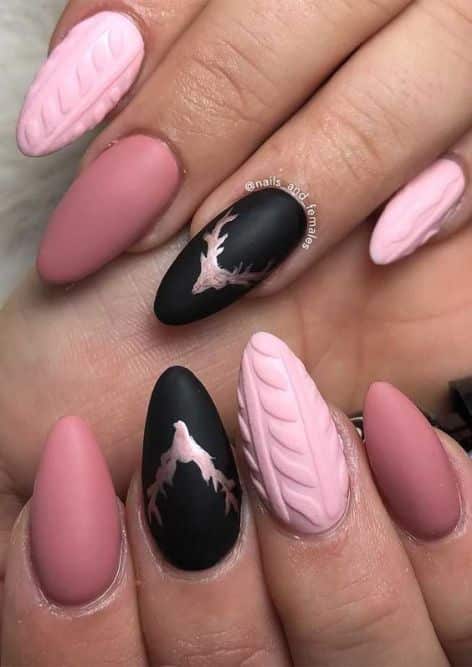
Maintaining your design also involves regular touch-ups. Here’s a simple table to guide you:
| Task | Frequency |
|---|---|
| Apply top coat | Every 2-3 days |
| Use cuticle oil | Daily |
| Touch-up nail art | As needed |
Protecting Your Nails
To protect your nails while enjoying sweater nail art, consider these tips:
- Wear gloves: Always wear gloves in cold weather. This prevents your nails from becoming brittle and breaking.
- Avoid harsh chemicals: Household cleaners can weaken your nails. Use gloves or switch to milder options.
- Maintain a healthy diet: Eat foods rich in vitamins and minerals. This keeps your nails strong from the inside out.
- Keep your nails at a manageable length: Longer nails are more prone to breakage. Trim them regularly to a length that suits your lifestyle.
Here’s a quick list of nutrient-rich foods for healthy nails:
- Leafy greens
- Nuts and seeds
- Eggs
- Fish
- Whole grains
Finally, make sure to hydrate your hands and nails. Use hand cream regularly to keep your skin and nails moisturized. This helps prevent dryness and maintains the integrity of your nail art.
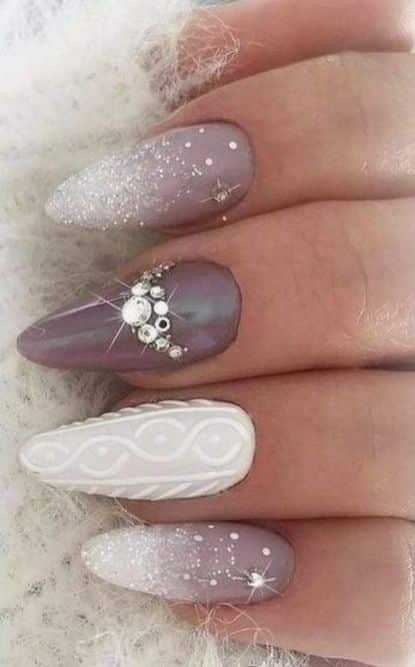
Source:instagram
Inspiration Gallery
Winter is the perfect time to cozy up with some creative nail art. Sweater nail art is a popular trend that brings the warmth and texture of your favorite winter sweaters to your fingertips. In our Inspiration Gallery, you’ll find a variety of ideas to help you get started on your winter nail art journey.
Real-life Examples
Seeing real-life examples can spark your creativity and help you visualize your own designs. Here are some inspiring sweater nail art examples:
- Cable Knit Design: This classic pattern looks stunning in muted tones like beige and grey.
- Chunky Sweater Texture: Use a 3D gel to mimic the texture of a chunky knit sweater. Perfect for a cozy look.
- Mixed Patterns: Combine different knit patterns on each nail for a unique and playful look.
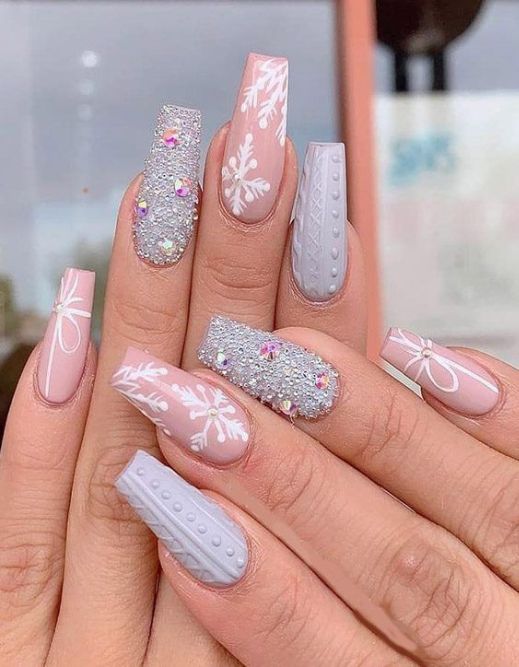
To give you more detailed inspiration, here is a table of some popular sweater nail art designs and the materials used:
| Design | Colors | Materials |
|---|---|---|
| Cable Knit | Beige, Grey | 3D Gel, Matte Top Coat |
| Chunky Knit | Pastel Pink, Cream | 3D Gel, Glossy Top Coat |
| Mixed Patterns | Various Shades | Acrylic Paint, Detailing Brushes |

Social Media Trends
Social media is a treasure trove of nail art trends. Platforms like Instagram and Pinterest are filled with stunning sweater nail art ideas. Here are some current social media trends:
- Monochrome Designs: Single-color designs are trending. They create a sleek and sophisticated look.
- Glitter Accents: Add a touch of sparkle to your sweater nails with glitter polish. This adds a festive touch.
- Matte Finishes: Matte top coats are popular for sweater nail art. They give a soft and cozy appearance.
For an in-depth look at these trends, consider these popular hashtags:
- #SweaterNails: Find thousands of creative designs under this hashtag.
- #WinterNailArt: Broaden your search to include all types of winter-themed nail art.
- #NailInspo: Use this hashtag for general nail art inspiration, including sweater designs.
Engaging with these trends will help you stay updated and inspired. Save your favorite designs and try recreating them at home or with your nail technician.
Frequently Asked Questions
What Is Sweater Nail Art?
Sweater nail art mimics the texture of cozy knit sweaters. It’s perfect for winter. This style involves intricate patterns. It often uses 3D gel or acrylic. The result is a warm, stylish look.
How To Create Sweater Nail Designs?
Start with a base coat. Use gel polish for the design. Create knit patterns with a fine brush. Cure under a UV lamp. Finish with a top coat.
Which Colors Are Best For Winter Sweater Nails?
Popular colors include deep reds, blues, and greens. White and nude shades are also trendy. These colors evoke winter vibes. They match well with winter outfits.
Are Sweater Nails Hard To Maintain?
Sweater nails can last up to two weeks. Use a good top coat. Avoid harsh activities. Moisturize your hands regularly. This helps maintain the design longer.
Conclusion
Sweater nail art adds a cozy touch to your winter style. This trend offers endless creative possibilities. Perfect for any occasion, it keeps your nails looking chic and festive. Dive into this trend and embrace winter with stylish, warm nail designs.
Your nails will thank you for the seasonal makeover.

